

// this is a bird's nest
What we're going to make:

2.5MB GIF
JSON is structured and that is why many web service opts to this format for communication between a client and server. In the old days, or even now, some web service still use obscure format like user-defined text strings separated by pipes or commas (CSV). Something like:
1,Q,London,23.7,22.6,22.3
2,Q,Tokyo,13.7,12.6,12.3
3,Q,Kuala Lumpur,28.7,32.6,32.3

You get the response and process it by splitting it by LFCR (Linefeed(newline) or Carriage Return - \n or \r) and further processing each lines by splitting it with commas. It can get complex. And can easily break if any column data suddenly has a comma in it. Or some server system only print out \n only or \r only. All sorts of unforeseeable problems in that department! In short, fuck that shit. haha.
And that is why most Public APIs uses JSON (or XML which is what PLIST are) to send data to a request from a client. In this tutorial, we will make a weather app by connecting to a FREE (free stuffs are groovy) weather API service called openweathermap.org.
First, as you would've guessed, you need to register an account at openweathermap.org. Go ahead and do that it's free. Once you've registered, log in and go to the API tab to get your API KEY. Most API calls require API key. It serves as the identification of the API caller (ie your app). There are some public APIs that don't require key (Twitter previously don't require API key either but now they do :\, and NASA too offers API without API key - those people at NASA are so nice. :D). I actually has one app that uses their MODIS Satellite data using their cool API, called HazeToday. It plots the hot spots (mostly fire) on the map and I also use another API from China to plot pollution index on the map.
Anyway, API Key normally looks like this:
f2c2dfdcf3d0e1e40f5ddff65f580a62
A long string of hexadecimal number. Obviously this is not my key. And it is also not your key. It is just an example of how the key look like. You need to copy your own key in the API tabs page of openweathermap.org and append it to your API url later on.
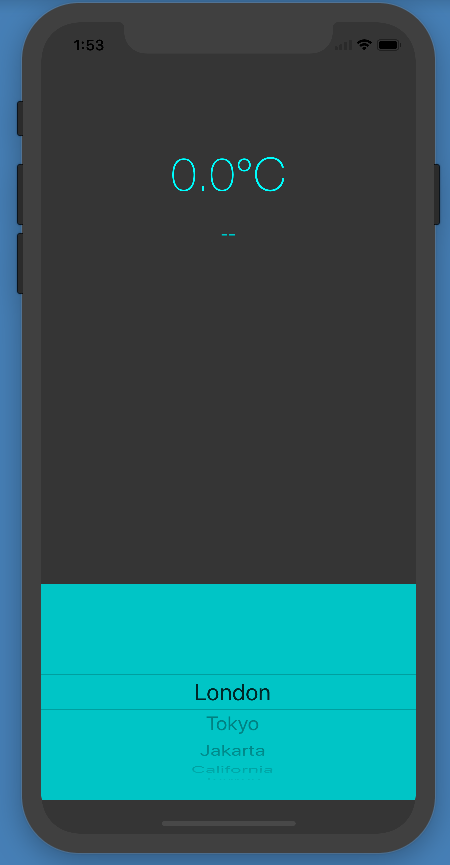
So let us create our Project in XCode. Choose a single viewcontroller template. Give it a name and when the project has been created, open the Storyboard and put two labels on it and change the appearance to be something like the image below. First label text is "0.0°C" and second label with a smaller font size with text "--" (two dashes). Remember to add the constraints.
After that, connect the 2 labels to their IBOutlets. Next lets add a picker with a list of famous cities in the world. Lets make it such that we can select a city and have the current temperature of that city shown on it. For this purpose, drop a UIPickerView on it and add constraints and connect the IBOutlet, datasource and delegate. Connect IBOutlet to the picker and add the UIPickerViewDelegate and UIPickerViewDataSource to the interface. You'll end up with something like this:

Our State-of-the-art UI :P
Now, we need to declare an NSArray to hold the city list. For this tutorial purposes, the array is going to be static, if you need it to be expandable, or read from a file/server, you may change it to NSMutableArray and add cities to it programatically.
Your ViewController.h should now look like this:
@interface ViewController : UIViewController <UIPickerViewDelegate, UIPickerViewDataSource>
@property (weak, nonatomic) IBOutlet UILabel *tempLabel;
@property (weak, nonatomic) IBOutlet UILabel *cityLabel;
@property (weak, nonatomic) IBOutlet UIPickerView *cityPicker;
@property (nonatomic, strong) NSArray *cityArray;

@end
Lets create the cityArray in viewDidLoad with some cities.
Note: If you create your data in viewDidLoad, you do not need to reload components of the pickerview as the pickerview sets its dataSource AFTER viewDidLoad.
self.cityArray = [NSArray arrayWithObjects:@"London",@"Tokyo",@"Jakarta",
@"California", @"Taiwan", @"Seoul",@"Delhi",@"Istanbul", @"Beijing", nil];
Next lets add the PickerView delegate methods and link our dataSource cityArray to it:
-(void)pickerView:(UIPickerView *)pickerView didSelectRow:(NSInteger)row inComponent:(NSInteger)component {

}

-(NSString*)pickerView:(UIPickerView *)pickerView titleForRow:(NSInteger)row forComponent:(NSInteger)component {
    return [_cityArray objectAtIndex:row];
}

-(NSInteger)pickerView:(UIPickerView *)pickerView numberOfRowsInComponent:(NSInteger)component {
    return [_cityArray count];
}

-(NSInteger)numberOfComponentsInPickerView:(UIPickerView *)pickerView {
    return 1;
}
If you run the app now, you will get a list of the city populated in the PickerView nicely. Check it out in the *ahem*, iPhone X simulator (lol that notch so fugly).
You can also scroll it and select a particular city. But nothing happens yet because our "didSelectRow" delegate is empty. What we need to do now is call the API when user selected a city. So lets create a custom method and construct an NSURLSession dataTask to request an API call to OpenWeatherMap.
There are many NSURLSession functions, namely downloadDataTask, dataTask, uploadDataTask, etc. NSURLSession is relatively new Apple API, before this developers use NSURLConnection. The advantage of NSURLSession is that it is an NSOperationQueue itself. So we can set its behaviour, or by default it will run serially. NSURLSession manages itself better and you should use it from now on.
-(void)getWeatherForCity:(NSString*)city {


    NSString *APIurl = [NSString stringWithFormat:@"http://api.openweathermap.org/data/2.5/weather?APPID=%@&q=%@",API_KEY,city];

    NSURLSession *session = [NSURLSession sharedSession];
    NSURLSessionDataTask *dataTask = [session dataTaskWithURL:[NSURL URLWithString:APIurl]
                                            completionHandler:^(NSData *data, NSURLResponse *response, NSError *error) {


                                            }];
    [dataTask resume];

}
Lets break this down piece by piece:
First of all, we need to construct the URL for the API call. Most public APIs follow the same format for GET method - [MAIN URL]/[API]?key=[YOUR_API_KEY]¶m1=a¶m2=b But it really depends on the API provider they can use any format they want. For POST method, the construct is a little different because the parameters are not inside the URL, instead it is embedded inside the request Command.
In our case,
[API] = weather
key = API_KEY
param1 = q
param2 = not available.
So with a simple NSString formatting, we can assign these to our string URL. A quick NSLog of APIurl should yield:
http://api.openweathermap.org/data/2.5/weather?APPID=YOUR_API_KEY&q=LondonCopying and pasting this to the browser, you should see some json results printed on your browser. But remember to replace YOUR_API_KEY with your hexadecimal key string otherwise it won't work.

-(void)pickerView:(UIPickerView *)pickerView didSelectRow:(NSInteger)row inComponent:(NSInteger)component {

    NSString * selectedCity = [_cityArray objectAtIndex:row];
    [self getWeatherForCity:selectedCity];
}
Now the session call code is done, lets see it work. Don't worry about the completion block code yet. What we need to do now is check whether our NSURLSession works or not. We can do this by adding NSLog to the completion block to see the response from the server to our simulator. Add it and now our code should look like this:
 NSURLSessionDataTask *dataTask = [session dataTaskWithURL:[NSURL URLWithString:APIurl]
                                            completionHandler:^(NSData *data, NSURLResponse *response, NSError *error) {

                                                NSLog(@"RESPONSE: %@",response.description);

}];IMPORTANT: If your public API uses http instead of https, your call will be blocked by the iOS. You need to add a little settings in the Info.plist. (App Transport Security key). You can read here for more information: https://stackoverflow.com/questions/31254725/transport-security-has-blocked-a-cleartext-http
If your API call is not blocked and if your internet is working fine, when you select a City from the pickerview, you will see a response from the server:

A response from server normally indicates the status of your call. A server may decline your call, due to several reasons, such as wrong parameters set, or other server related errors. The response from Openweathermap is one of the best response I have ever seen. It reports, status code (400 = successful), and lots of info in the header - supported call methods (GET/POST), and etc). Normally we don't use these, except for status code, so we can handle the response in our app - for example, if the response is successful, then we read the data and display, but if the response code is other than code 400, we may display an alert to user "Server error, please try again later"... or something like that.
Another way to do this is to simply check for the error returned. If it is nil, then it could be successful, or it could be timed out. That is entirely up to the developer which to choose. For our tutorial, lets assume the server always replies with code 400 (ie successful) and the error is always nil. So we can immediately process the data received.
The data sent by the server is string encoded as NSData, so we need a way to convert this data (which is binary format) into a string. We do this by using an available iOS API call of NSString class method initWithData: encoding: Lets add NSLog again, but this time to display our converted data. Your getWeatherForCity now looks like this:
-(void)getWeatherForCity:(NSString*)city {


    NSString *APIurl = [NSString stringWithFormat:@"https://api.openweathermap.org/data/2.5/weather?APPID=%@&q=%@",K_API_KEY,city];

    NSURLSession *session = [NSURLSession sharedSession];
    NSURLSessionDataTask *dataTask = [session dataTaskWithURL:[NSURL URLWithString:APIurl]
                completionHandler:^(NSData *data, NSURLResponse *response, NSError *error) {

                 NSString* dataStr = [[NSString alloc] initWithData:data encoding:NSASCIIStringEncoding];
                NSLog(@"Result: %@", dataStr);


                }];
    [dataTask resume];

}
Assuming no errors for both cases, when we run the app, and selecting a city, we will get the result:

GREAT! Now we have this json in string format we can process it and pick which data we want to display. As you can see, there are quite many data available here, but we're going to display one only and that is "temp" data tucked inside the json structure. When you see this structure, you might freak out. But don't. Instead copy it and paste in http://jsonviewer.stack.hu/. Then click on the Viewer tab, you will be able to view the data structure better:

NSData * jsonData = [dataStr dataUsingEncoding:NSASCIIStringEncoding];
NSError * error=nil;
NSDictionary * parsedDict = [NSJSONSerialization JSONObjectWithData:jsonData options:kNilOptions error:&error];
Now we can use parsedDict, traverse into the temp key and get the value and display.
NSDictionary *mainDict = [parsedData objectForKey:@"main"];
_tempLabel.text = [mainDict objectForKey:@"temp"];
If you run it, you probably will have a crash. LOL! What's wrong? Firstly, take a good look at the JSON format in the online viewer. temp holds a number. That means, the returned object of key "temp" is an NSNumber and not an NSString. An example of NSString object in the json is in the "name" key which is "Tokyo". Whatever that is inside a double quote, that is safe to assume that it is a NSString. Otherwise it is an NSNumber especially the data is a number like 23.5, or 35. And by logical thinking, for example a data of 456F is an NSString even if it does not have a doublequotes. Thus we need to change our code:
NSDictionary *mainDict = [parsedData objectForKey:@"main"];
NSNumber *tempNum = [mainDict objectForKey:@"temp"];
dispatch_async(dispatch_get_main_queue(), ^{
      _tempLabel.text = [NSString stringWithFormat:@"%.1f°C", [tempNum floatValue]];
});
Whoa. What's going on in this code? It is quite simple, except the dispatch part. First we assign the object from "temp" key to an NSNumber variable. Then we format it as a NSString and assign it to our label. That is pretty much it. %.1f format indicates we want a floating number with 1 decimal place. And suffix it with °C. Note, we also convert the NSNumber to a float first before supplying it to our string formatter.
So what is the dispatch thingy? It is a useful function to grab the main thread. As a general rule in software design, any update to the UI, must be done on the main thread. But our NSURLSession is a thread that runs in the background, thus if we want to udpate the UI in its block, we need to call the main thread and that's what dispatch thingy does.
Go ahead and run the app you will get the value displayed in the label when you select a city:


But wait, why is the temperature so high? 277 deg Celcius in London?? People will burn! Oh wait. Checks on openweathermap.org shows that temperature is in Kelvin. So we need to convert the number from Kelvin to Celcius using the formula:
T(°C) = T(K) - 273.15
Translating that to code:
float tempFloatK = [tempNum floatValue];
float tempFloatC = tempFloatK - 273.15;
What about the City label? You have 2 options here. One is to set it directly from the pickerview, or you can get it from "name" key in the json data. Lets just get it from json data. Add the following code to the getWeatherForCity method (bolded code is newly added):
NSDictionary *mainDict = [parsedData objectForKey:@"main"];
NSNumber *tempNum = [mainDict objectForKey:@"temp"];

float tempFloatK = [tempNum floatValue];
float tempFloatC = tempFloatK - 273.15;
NSString *cityStr = [parsedData objectForKey:@"name"];

dispatch_async(dispatch_get_main_queue(), ^{
       _tempLabel.text = [NSString stringWithFormat:@"%.1f°C", tempFloatC];
       _cityLabel.text = cityStr;
});
Now when you run the app, selecting a city, will show the temperature and city name underneath it. We're done! Below is the GIF of the app in action.
Further considerations: If you want to make this into an app, there are more things to consider:
1. A "loading" indicator right after a user selects a city.
2. Error messages if there is no internet
3. Error messages if the server is not returning any data or any other server related error
4. You can add more data to display since the server returns quite a handful of data.
5. Other cool features: Adding animations, nice pictures, even links to video of the city.
With that, we conclude our tutorial! Thanks fam.

I just realized I left the API KEY in the sample code. Yes you may use it for testing before openweathermap block it.
ReplyDeleteThis comment has been removed by a blog administrator.
ReplyDeleteThis comment has been removed by a blog administrator.
ReplyDelete